Thursday, December 24, 2009

Christmas at Home

My cooking style has been heavily influenced by a few select sources. I have a good cookbook collection, but it’s by no means a library. I return again and again to a few favorites, particularly my huge Gourmet cookbook, which, despite its name, contains many delicious dishes even an only mildly aspiring cook could tackle with ease. I enjoy consulting Joy of Cooking for all that I learn about ingredients from its pages. I have a few “specialty” cookbooks: I couldn’t get along without the voluptuous Nigella Lawson and her sensuous baking advice and I appreciate the simplicity, clarity, and definition of Giada deLaurentiis’s Italian foods. But when I dug out my traditional Christmas recipes last week, what struck me was how they all came from the same source, Taste of Home magazine.


To be honest here, I had to let my subscription expire a few years ago and I gave away all my back issues to a young friend just starting out in her own apartment. My hope was that she would find in those pages the same thing I had found: inspiration for cooking the kinds of foods that remind us of what home can be: warm, familiar, and comfortable, with spice enough to be interesting, and ingredients common enough for the weekly trip to the grocery store. I cut my cooking teeth on Taste of Home, and I’m glad I did, because years of cooking from its pages gave me confidence that I could turn out something pleasing and delicious without a lot of fuss and bother, even on a weeknight after a hard day of teaching and writing conferences.

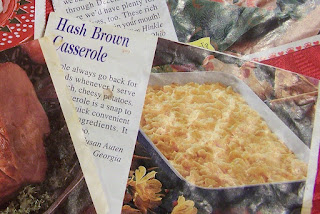
Of these recipes that I return to every Christmas I’ve tweaked some to reflect my family’s palate preferences. For instance, I use a different cut of ham and stud it with cloves before slathering on the glaze. I puree the canned potato soup before adding it to the hash brown casserole, and I’ve fiddled a little with the rest of the ingredients. For the cheesecake, I use a chocolate graham cracker crust from which I leave out the sugar, and I use about 2 cups of cranberries but don’t change any other ingredients, for I’ve found we need the extra tartness to offset the cloying sweetness of eggnog. No matter, though. These recipes taste like home to us.

Here’s the Cranberry Cheesecake recipe.

Sugar-Glazed Ham
adapted from Taste of Home magazine
(This size ham will easily feed 15 people, or you can eat it all yourselves, with plenty left over for frying for breakfast the next morning, and the next, and the one after that, which is what we like to do.)


1 bone-in half ham, shank end, 8 to 10 pounds
a handful of whole cloves
¾ cup white wine or water
2 cups packed brown sugar
4 teaspoons prepared mustard
2 to 4 tablespoons cider vinegar

Preheat your oven to 325˚. Score the ham in a diamond pattern about ½ inch deep with a sharp knife. Insert a whole clove into each scored intersection. Place the ham on a rack in a shallow baking pan. Pour the wine into the pan. Insert a meat thermometer into the center of the ham, without touching the bone. Bake for 2 to 2 ½ hours, or until the thermometer registers 150˚.

Meanwhile, combine in a small bowl the sugar, mustard and enough cider vinegar to make a thick paste.

When the ham reaches 150˚, remove it from the oven and raise the temperature to 350˚ (so that you can finish baking the ham and bake the hash browns at the same time). Use a paring knife to remove the rind and excess fat. Slather the glaze over the ham and baste it with some of the drippings. Return it to the oven. Bake another hour, or until the thermometer registers 160˚. Let it rest about ten minutes before slicing; spoon over the pan drippings and serve.

Hash Brown Casserole
adapted from Taste of Home magazine
(We apparently have big appetites for despite its recommended 12 to 15 servings, we have found that this amount will comfortably feed eight people.)


1 (10 ¾-ounce) can condensed cream of potato soup
1 ½ cups sour cream
½ teaspoon garlic salt
1 (1-pound, 14-ounce) package frozen hash brown potatoes
2 cups (8 ounces) shredded cheddar cheese
½ cup grated Parmesan cheese

Preheat your oven to 350˚. Grease a 13- by 9-inch baking dish.

Puree the soup until smooth. Pour it into a bowl and mix it well with the sour cream and garlic salt. Add the potatoes and cheddar cheese and stir to combine. Spoon everything into your greased baking dish and sprinkle the Parmesan cheese on top. Bake, uncovered, for about an hour, or until the potatoes are tender and the top is all yummy and crisp.

A very merry Christmas to you and yours. I’ll see you on the other side.


Saturday, December 19, 2009

Tis the Season for Giving Goodies

One of our favorite Christmas traditions is baking pumpkin bread for the neighbors. I think they like it; no one’s ever said anything to the contrary, and they keep taking it, so I guess it goes over all right. Because Christmas wouldn’t feel the same if I didn’t bake this bread every year, I spent the perfect afternoon yesterday baking up eight loaves while Enya’s Christmas album spun on the CD changer, the kids played out in the cold, and my husband hung ornaments on the tree.


This weekend marks the start of Christmas vacation for a lot of folks—school’s out, kids are home from college, and it’s snowing all over the country. Of course here in Florida it’s been a long time since we’ve seen snow, but our own brand of Christmas weather includes temperatures in the 40s and brisk wind. Don’t you wish you were here? If you were, we could sit over a cup of coffee and this bread spread with whipped cream cheese.


This moist bread is almost like cake, and you may find it a bit sweet, so feel free to pull back a little on the sugar. With the chopped apple, there’s plenty of tartness to balance out the sweet, though. Try it once and then for the next batch adjust to your liking. The original recipe called for a streusel topping, but I found that unless the bread was eaten right away, the topping softened right up, rendering it superfluous. Because this bread is even better when eaten the next day, I leave the streusel out.

I have to confess I love this bread year-round and have been known to eat almost an entire loaf myself, pretending to be surprised with everyone else in the family when they said, “Is all the pumpkin bread gone already?” I like to think I’ve perfected my response, uttered with just the right puzzled look on my face: “Is it? Wow, we went through that pretty fast.”


Unfortunately for me, though, this latest batch of eight loaves has been safely snuggled into Christmas-themed plastic wrap. The kids and I have put on our jackets and are heading out to do a little Christmas delivery. Fortunately for me, we have only seven neighbors.

Pumpkin Apple Bread
makes 2 loaves
adapted from The Gourmet Cookbook

3 cups all-purpose flour
¾ teaspoon salt
2 teaspoons baking soda
1 ½ teaspoon ground cinnamon
1 teaspoon ground nutmeg
¼ teaspoon ground cloves
¼ teaspoon ground allspice
1 15-oz can pumpkin
¾ cups canola oil
2 cups sugar
4 large eggs, lightly beaten
2 large tart apples,

Preheat your oven to 350˚. Grease two 9- by 5-inch loaf pans with a little shortening. Sift the flour, salt, baking soda, cinnamon, nutmeg, cloves and allspice into a medium bowl. Put the pumpkin, oil and sugar into a large bowl and whisk until combined. Pour in the eggs, a little at a time, and whisk until all are incorporated. Add the flour mixture and, yes, whisk some more.

Peel and core your apples and cut them into large pieces which you need to put into the bowl of a food processor. Pulse until all are finely chopped. You’re looking for chunky applesauce consistency, more chunky but still sauce. Fold this not-quite-puree into the rest of the batter. Divide the batter between the pans and bake until a toothpick inserted into the center of the bread comes out clean, about 50 minutes to an hour.

Cool the loaves in the pans on wire racks for half an hour, then remove them from the pans and cool completely, about an hour more. When they are completely at room temperature, wrap them in plastic wrap and then foil and store overnight. Eat the loaf the next day, warmed in the toaster oven and spread with whipped cream cheese, or scarf it down plain while everyone else is watching “Santa Claus Is Coming to Town.”

And a Merry Christmas to you.

Wednesday, December 16, 2009

I’m Ready for Thanksgiving, Round II

It has been both too long and not long enough since Thanksgiving to be talking about turkey again. Not long enough, because as much as I like preparing the traditional feast (with help from my mother-in-law and whatever friends are coming over), I’m glad it’s a once-a-year production. But it’s also been too long since I’ve tasted the savory roasted turkey with sage and thyme, the rich and silky giblet gravy, the moist dressing made with egg bread and love, and cranberry’s tart counterpoint. Why shouldn’t we enjoy these delectable flavors more than once a year? But without quite so much prep, right?


With that in mind, it’s high time I share with you my daughter’s Gobble-It-Up-Turkey Burger recipe. My nine-year-old invented this dish for a burger contest sponsored by Red Robin restaurants. She didn’t win the contest, but she did win over our family with this classic yet original combination of flavors.

This version is a little different from the one she submitted to the contest, which had to follow certain rules. It’s delicious and full of flavor. You may never go back to beef again.


Gobble-It-Up-Turkey Burger with Cranberry Relish
serves 4

Ground turkey is much softer than ground beef, so work it gently and don’t over-handle it. Also, cook the patties at medium heat, not high the way you would for beef burgers. With beef, you want a screaming-hot pan so you can get a good sear while quickly cooking the burgers to medium in the middle. But since turkey has to be cooked all the way through, it takes a few minutes longer. If your pan is too hot to start, you’ll burn the outside before the inside is done.

for the relish:
1 12-oz package cranberries
1 cup water
1/3 cup sugar
½ teaspoon dried thyme or 2 to 3 stems fresh thyme
¼ teaspoon coarse ground black pepper or more to taste

Combine all ingredients except black pepper in a saucepan. Bring to a simmer over medium heat and cook until cranberries begin to pop, 3 to 5 minutes, stirring occasionally. Remove from the heat, remove the thyme stems, if using, and season with black pepper. Set aside. The relish can be prepared 2 days ahead. Cool to room temperature before chilling. Return to room temperature before serving. You will not use all of this relish for this recipe.

for the burgers:
2 tablespoons unsalted butter
1 medium onion, finely diced
1 celery rib, finely diced
2 cloves of garlic, minced
1 teaspoon kosher salt
½ teaspoon coarse ground black pepper
1 ¼ pounds ground turkey, white and dark meat together, if available
1 teaspoon ground sage
1 teaspoon dried thyme
accompaniments: mayonnaise, butter lettuce, smoked provolone cheese slices, canned crispy fried onions, sesame seed buns

Melt butter in a skillet over medium-low heat. Cook onion and celery until softened and translucent. Season with salt and pepper Add garlic to skillet and cook 2 minutes more. Transfer onion mixture to a large bowl and set aside. Wipe out the skillet with paper towels and increase heat to medium.

To the onion mixture, add the turkey, sage and thyme. Using your fingertips to avoid overworking the meat, mix all together and gently form into four patties. Cook over medium heat 4 to 6 minutes per side, or until cooked through.

To assemble: Spread mayonnaise on the bottom of a sesame seed bun. Top with butter lettuce, turkey burger, smoked provolone cheese, and crispy fried onions. Spread cranberry relish on top of bun and cover.

Tuesday, December 8, 2009

Homemade Pizza

Purists may tell you that you can’t get good pizza anywhere outside New York or Chicago, depending on their preference for thin and crispy or soft and deep. Well, the truth is that there are many great pizzerias in home towns all over this country. And I’m not talking about chain restaurants here, though occasionally they do hit the right formula. I’m talking mom and pop places that mix their ingredients in the kitchen and have blast furnaces for ovens. It takes that high temperature for the perfect crust that’s crispy on the bottom and chewy throughout. No home oven can get that hot.


Does that mean you shouldn’t even bother? No, of course not. Though you can’t get exactly the same taste and texture out of your own kitchen, you can get some remarkable results with a handful of common ingredients and a modicum of skill.

Let’s talk ingredients. All you need to make good pizza dough is water, yeast, honey, oil, flour and, of course, salt.

First, the water. If your municipality has a good water supply, go ahead and use it right from the tap. The minerals in your water will give your pizza its own unique flavor. (Excellent water, incidentally, is the reason New Yorkers insist they have the best-tasting pizza. They may be right.) If you don’t like your water, use filtered or bottled instead. Be sure your water is in the right temperature range. If it’s too low, the yeast won’t wake up; if too high, the yeast will die.

Honey will feed the yeast and oil will give a little gloss to the dough. The salt is for flavor, but do not add it until after much of the flour has been incorporated since it is a yeast inhibitor.

As for flour, I like to use all-purpose and bread flours, for a perfect combination of softness and chewiness. If all you have on hand is all-purpose flour, by all means use it.

My standard method for rising yeast dough is this: I heat my oven to the lowest it can go—170˚. When it’s hot, I turn it off and open the door to let out any built-up heat, then close the door to let the oven cool. I get on with the mixing, kneading, oiling and covering, by which time the oven is about 80˚, the perfect temperature for rising. This method is usually unfailing. Just be sure that when you preheat your oven to 500˚ in order to bake the pizza you remove the bowl of risen dough first. I know this from experience.


Pizza Dough

This recipe will make enough dough for two medium or four individual-sized pizzas. For shaping the dough, if you know how to throw it up in the air, and catch it on your knuckles (which is the part I always miss), by all means go ahead. Otherwise, hold the dough ball in your hands, grasp an outer edge and begin turning it in your hands like a steering wheel. Gravity will stretch the dough for you and the part your hands touch will serve as a raised edge.

1 cup very warm water (between 110˚ and 115˚)
1 tablespoon honey
1 tablespoon olive oil, plus more for oiling the bowl
2 packages active dry yeast
1½ cups all-purpose flour
1½ cups bread flour
2 teaspoons salt

Pour the water into the bowl of a stand mixer. Add the honey and 1 tablespoon of olive oil. Sprinkle the yeast on top and stir until everything is nicely dissolved. Add the flour and, using a dough hook, mix on low speed until some of the flour has been incorporated; add the salt and mix on medium speed until the dough forms a ball that pulls away from the side of the bowl and wraps around the hook. Continue mixing for another 3 to 4 minutes.

If you don’t have a stand mixer, you can do this by hand; it will just take a bit longer. Stir the ingredients with a spoon until you have a raggedy mess. Abandon the spoon at this point and reach in with your hands. Mix and press the dough together and against the sides of the bowl, getting as much of the dough goodness to adhere as possible. Then proceed to the next step.

Turn the dough out onto a very lightly floured surface. Knead by pushing the dough away from you with the heel of your hand and then folding it back over on top of itself and giving it a quarter turn each time. If you have used a stand mixer, you’ll want to knead by hand for 3 to 4 minutes; if you’re doing the whole thing by hand it will take up to 10 minutes. Either way, you want to keep at it until the dough is smooth and elastic. Start your favorite play list and have at the dough. You can count this as your exercise for the day.

Pour a scant teaspoon of olive oil into a clean bowl and rub it all around the bowl with your fingers. Plop in the dough and swipe it around until it is covered all over with a thin layer of oil. Cover the bowl with a clean towel or with plastic wrap and put it in a warm place to rise. In about 30 minutes to an hour, the dough should have doubled in size and will be ready to be shaped, topped and baked, preferably in a preheated 500˚ oven.

At this point you’re on your own. But you won’t have any trouble with that, will you? There’s no magic formula for pizza toppings; simply put on what you like best, whether that be olives and pepperoni or bacon and caramelized onion. Brushing the dough with olive oil and sprinkling on nothing but fresh thyme, rosemary, and chiffonade of basil is an astounding way to eat pizza. The flavors will wake up your mouth.

You see? Great pizza with what you have right there at home. Now you can take blast furnace off your Christmas list.

Tuesday, December 1, 2009

Shrimp Scampi with Polenta

We feel very fortunate to live where fresh, local seafood is readily available. There is nothing, I mean nothing, like a Royal Red shrimp caught in the morning and sizzling in your cast iron skillet or over your grill that afternoon. When you bite it, the shrimp gives a little and then snaps under your teeth, and its flavor is sweet and slightly saline. You can’t get those sensations or flavors from anywhere else.


But we have come to appreciate the convenience of shrimp from the grocery store’s freezer. Scampi is one of our favorite preparations.


The idea for infusing the shrimp with garlic three ways (raw in a marinade, in garlic-infused oil, and sautéed with the shrimp) comes to me via Cook’s Illustrated. The polenta is adapted from Giada de Laurentiis’s Everyday Italian. I use more water and a little less salt than she does. My husband and I easily eat this entire recipe ourselves.

Of course you can serve shrimp scampi with crusty bread for soaking up the delicious garlic oil, but we really like it with polenta.

You may have to make this a couple of times to get the timing just right, because you want the shrimp and polenta to be finished at exactly the same moment. Fortunately, the polenta can be left alone during its last five minutes of cooking; the shrimp, however, cannot.


Shrimp Scampi with Polenta

for the shrimp:
14 cloves of garlic
1 pound 31-40 shrimp, deveined, tails removed
5 tablespoons olive oil
½ teaspoon table salt
1 teaspoon lemon juice
2 tablespoons chopped fresh parsley

Smash six garlic cloves with the flat of a chef’s knife to remove the paper. Mince two cloves of garlic and toss with the shrimp, one tablespoon of the olive oil and the salt in a medium bowl. Allow the shrimp to marinate for about half an hour at room temperature.

While the shrimp is marinating, heat remaining 4 tablespoons olive oil over medium-low heat in a cast-iron or other heavy 12-inch skillet. Add the four smashed cloves garlic and cook about 5 minutes. Remove the garlic and discard. Set the garlic-infused oil aside.

Peel the remaining garlic cloves and slice very thinly. Return the skillet to medium-low heat and add the shrimp with its marinade in a single layer. Sprinkle the sliced garlic into the oil around the shrimp. Cook for about 2 minutes, or until a little pink shows around the sides of the shrimp. Turn each shrimp over and cook about 2 minutes more. Increase heat to medium-high and add the lemon juice and the parsley to the skillet. Cook, tossing everything together, until the shrimp are cooked through and the oil is sizzling, about half a minute.

for the polenta:
3 cups of water
1 teaspoon salt
1 cup yellow cornmeal
2 tablespoons unsalted butter

Bring the water and salt to a boil in a medium saucepan. Pour in the cornmeal slowly, whisking the whole time with a long-handled whisk. Reduce the heat to look and cook, whisking often, until the cornmeal is cooked, about 15 minutes. Remove the pan from the heat and stir in the butter until melted.

To serve: spoon the polenta into a shallow serving dish and pour the sizzling garlic, shrimp and oil over the top.