Saturday, October 31, 2009

Isn’t There a Better Way to Hull Pumpkin Seeds?


I’m not exactly sure why I toast pumpkin seeds every year. I buy a big pumpkin and go through a lot of trouble cutting off the top, scooping out all the slimy innards, and separating the seeds from the pulp. Even given all that work, the task isn’t done yet. After separating the seeds, I have to wash them, dry them on paper towels, peel them off paper towels, and roast them with oil and salt. I do this every year and I have no idea why, because I don’t like roasted pumpkin seeds.


Toasting pumpkin seeds from the October jack-o-lantern seems such a very nostalgic, American thing to do. We toasted them every year when I was growing up, and I was supposed to like them, but I never did. The truth is that roasted pumpkin seeds, still in the hull, are not very tolerable. The husks are—well—husky. They fall somewhere between crunchy and stringy. The little kernel inside is good, oh my yes, but it’s such a lot of work getting out, especially after already working hard to get them to this somewhat edible point, that I never found eating them enjoyable.

Getting them out of the hull prior to roasting seemed a task better left to machines.


This year, however, fully into the jack-o-lantern spirit, we bought—count them—three pumpkins, and after scraping and scooping a huge bowlful of pulp I couldn’t bear to see it all go to waste. Given that chefs and other assorted foodies rave over pumpkin seeds, I decided I’d have to find a better way to make them palatable.

I formed a two-pronged mission: first, find a method of roasting seeds that rendered them crisp and crunchy and delicious in the hull and second, see what the fuss over hulled toasted pumpkin seeds is all about.

To the first mission, I found a possible solution in Joy of Cooking, which recommended bringing to a boil a pan full of seeds in salted water and then simmering them for a couple of hours before drying, oiling, salting, and roasting them in a medium-low oven. That sounded promising. I gave it a try.

Though, after simmering, the seeds had an unappetizing gray hue, I pressed on with the directions. After an hour in the oven, here is what emerged.


You’ll have to take my word for it that these were just as good as they are pretty. They turned out just as I had hoped. They were crisp and crunchy with no weird edges that stuck in my teeth. Not to mention they tasted nutty and salty. Mission one accomplished.

Now to the second mission. After drying the seeds overnight, I found the hulls soft enough to pick off with a fingernail. A sharp paring knife worked even better. A little experimenting yielded this strategy: Starting at the pointed end, I cut off the side of the husk, trying not to cut too deeply and scrape off the side of the seed. Using my fingernails then, it was easy to peel the two flats back and slip the kernel out. Things worked even better when I recruited two helpers.


Yes, we did peel, by hand, two cups of pumpkin seeds. I have the calluses to prove it, but I’ll spare you those photos. I couldn’t think of any other technique; I never thought of Google. (I did think of it later, however, and the only technique I uncovered involved a plastic bag and a mallet. Since I wanted intact kernels, it’s just as well I did them by hand.)


Aren’t they beautiful?


Of course they are.

And let me tell you about toasting them. I now know what all the fuss is about. Hulled pumpkin seeds, cooked in a cast-iron pan over moderately low heat in a little olive oil and then salted are delicious. They are crunchy, but not crisp; they give a little when you bite them. They taste nutty. They taste just the tiniest bit like the best popcorn smell you’ve ever smelled.


Toasted hulled pumpkin seeds are worth every bit of fuss. And now I know why I should buy a big pumpkin every year.


The best way to serve the pumpkin seeds, if you can avoid eating them right out of the skillet, which I found difficult to do, is on top of pumpkin soup. The chipotle in this soup is not overpowering at all; you'll find that there's just enough heat and sweetness from the pumpkin and the merest bit of brown sugar that you'll want another bowl. And then another one after that.

Pumpkin Soup with Chipotle, Bacon and Toasted Pumpkin Kernels

4 slices bacon, diced
1 tablespoon olive oil
1 medium onion, chopped
2 ribs of celery with leaves, chopped
1 tablespoon chipotles in adobo, minced
1 tablespoon crystallized ginger, minced, or 1 tablespoon freshly grated ginger, or ½ teaspoon ground ginger
1 ½ cups chicken stock
1 ½ cups milk
3 cups pumpkin puree
1 tablespoon brown sugar
½ teaspoon ground cinnamon
½ teaspoon freshly grated or ground nutmeg
½ teaspoon ground allspice
kosher salt and freshly ground black pepper
sour cream, additional nutmeg, toasted pumpkin kernels

In a saucepan, heat the chicken stock and milk until hot but not boiling.

In a large pot, cook bacon in olive oil over medium heat until crisp. Remove bacon bits with a slotted spoon to a paper towel and set aside. In the same pot, cook the onion, celery, chipotle, and crystallized ginger (if using) until tender but not browned. Pour hot stock and milk over. Stir in pumpkin puree, cinnamon, nutmeg, grated or ground ginger (if using), and allspice. Bring to a simmer over medium heat. Use an immersion blender to puree the soup, or puree in batches in a blender until smooth. Add salt and pepper to taste; heat through.

Ladle soup into bowls. Top with a teaspoon of sour cream, a pinch of nutmeg, reserved bacon and toasted pumpkin kernels.

Friday, October 23, 2009

Soft Pretzels, Philadelphia-Style

If you could have seen me yesterday morning, you’d no doubt have noticed the flour dusted all over the front of my t-shirt. But what I hope would have been most prominent was the satisfied smile on my face. I had just eaten a warm soft pretzel with a smear of mustard on top.


Yes, I’m celebrating the Phillies and their big win over the Dodgers Wednesday night, making them the twice-running National League champions. Phillies, I hope youse take it all the way.

But I’m also providing this recipe by request. Several of you have asked for recipes, techniques, and ideas, and I hope you’ll keep the requests coming. When I’m in the middle of several food writing projects, our family lives in a happy, happy mess. I’m working on your requests, and more will be unrolling within the coming weeks.

Now about these pretzels. A homemade soft pretzel can be excellent, but it might never have exactly the same flavor as a commercially-made pretzel because many commercial bakers spray pretzels with a solution containing 1% lye to 99% hot water. This solution changes the starches on the surface of the pretzel, giving the pretzel several new colors and flavor compounds as it bakes. Not to worry about the lye, however, because in the oven, carbon dioxide acts on the lye, rendering it harmless and edible. (I’m grateful to the wonderful Harold McGee and his incomparable On Food and Cooking: The Science and Lore of the Kitchen, 2004 ed., p. 547, for this information.) It is possible for home bakers to purchase food-grade lye (check internet sources, but make sure what you're getting is food-grade, not soapmaking-grade), but it’s more convenient—not to mention safer—to use baking soda in the boiling water.


As I researched, I found a few different approaches to pretzel-making. Some recipes used hot milk in place of most of the water. Others used an enormous amount of sugar, up to three-fourths of a cup. Some recipes omitted the sugar or the salt, or both. When I read Alton Brown’s recipe “Homemade Soft Pretzels” I thought it seemed to make the most sense.

I recommend a few modifications and tips:

Flour: Replace half of the all-purpose flour with higher-protein bread flour, for the extra chewiness it will provide.

Kneading: If you have a Kitchen Aid Ultra Power 300-watt stand mixer, which is what I have, keep the speed at medium low. Any higher and your mixer might walk all over the counter. If you don’t have a stand mixer, you can still make these. Use a wooden spoon for the initial mix. When the dough gets too stiff to stir, turn it out onto a lightly oiled surface and knead for about 10 minutes.

Rising the dough: To rise yeast dough, preheat your oven to its lowest temperature (mine goes down to 170˚). As soon as it comes to temperature, open the oven door, shut the oven off, and then close the door. In the time it takes to mix and knead the dough, the oven should cool to the perfect rising temperature, about 80˚.

Twisting the dough: For a classic Philly shape, you want these pretzels long and relatively narrow, with a short twist in the vertical middle. Here’s how to do it: Roll your dough into a rope 27 to 30 inches long, thicker in the middle. Keeping most of the rope on the work surface, lift the two ends and draw them toward each other; twist twice close to the end. Fold the twisted part to the opposite side. Tuck the ends under and press firmly.


Oiling the pans: Make sure there is plenty of oil on the baking pans. Because the raw dough will pick up some of the oil and take it into the bath, leaving a less-oiled pan to which the baking pretzels might stick, you might want to use 4 oiled pans, 2 pans for the pretzels waiting for their bath and 2 pans for the pretzels to bake on.


Pretzel salt: Because I had it in the house, I used kosher salt on top of the egg wash. While the pretzels were very good, they really cried for pretzel salt. You can find it here and here.

It didn’t take us any time at all to polish these off, which gluttony we rationalized by saying when they cooled they probably wouldn’t be as good anyway. The only thing missing was a tall mug of root beer.

Soft Pretzels, Philadelphia-Style
(recipe 99% Alton Brown’s; original recipe here )

1 ½ cups warm water (110 to 115˚)
1 tablespoon sugar
2 teaspoons kosher salt
1 package active dry yeast
11 ounces all purpose flour (about 2 ¾ cups)
11 ounces bread flour (about 2 ¾ cups)
2 ounces (about 4 tablespoons) unsalted butter, melted and cooled slightly
vegetable oil, for baking sheets
10 cups water
2/3 cup baking soda
1 large egg yolk, beaten with 1 tablespoon water
pretzel salt

Combine the water, sugar, and salt in the bowl of a stand mixer and sprinkle the yeast on top. Allow to sit for 5 minutes, or until the mixture foams. Add the flour and the butter and, using the dough hook attachment, mix on low speed until well combined. Change to medium speed and knead until the dough is smooth and pulls away from the side of the bowl, approximately 4 to 5 minutes. Transfer dough to a second, oiled bowl, and roll it in the oil. Cover with plastic wrap and set it in a warm place for about 50 minutes to an hour, or until the dough has doubled in size.

Preheat the oven to 450˚. Lightly brush two baking pans with vegetable oil.

Bring 10 cups of water and the baking soda to a rolling boil in a large saucepan.

Turn the dough out onto a lightly oiled surface and divide into 8 pieces. Roll out each portion into a 27- to 30-inch rope. Twist into a Philly-pretzel shape, following the directions above. Place each pretzel on a baking sheet.

Using a spatula under one end of the pretzel and your free hand supporting the middle knot, lower each pretzel, one at a time, into the boiling water. Boil for 30 seconds to a minute. Remove from the water with the spatula. Return the pretzel to the baking pan; brush the top of each with the beaten egg yolk and water mixture and sprinkle with pretzel salt. Bake until golden brown, about11 to14 minutes. Cool about 5 minutes before eating.


Wednesday, October 21, 2009

In the Presence of Pumpkin

We’ve been stocking up on pureed pumpkin, buying a can or two every time we make a run to the grocery store. My husband read somewhere that there’s supposed to be a shortage of it this year, and we wanted to make sure we had a can ready for Thanksgiving’s traditional pie.


Of course, now I have to get creative with canned pumpkin, since I have in my cabinets six or seven times as much as I’ll need for that fourth Thursday in November. Pumpkin muffins are obvious, but I hope you’ll try these anyway, because the apple amps up the moisture and the flavor. The scent of these baking, along with the scent of the grapefruit that we sliced for breakfast, grapefruit from our neighbor’s tree, swung us fully into fall.

And now I’m off to brainstorm—pumpkin soup with toasted pumpkin seed kernels, pumpkin butter, smashed potato and pumpkin with maple and sour cream, and maybe a pumpkin-pecan cheesecake. What are your favorite pumpkin treats?

Pumpkin-Apple Muffins

Be sure to grate the apple on the small holes of a box grater, not the large ones.

1¾ cups all-purpose flour
2 teaspoons baking powder
1½ teaspoons ground cinnamon
¾ teaspoon ground nutmeg
¼ teaspoon ground cloves
¼ teaspoon ground allspice
¼ teaspoon salt
1 egg, separated
¾ cup buttermilk
¼ cup butter, melted and cooled slightly
1 cup sugar
1 teaspoon vanilla
½ cup canned pumpkin
1 small Granny Smith apple, peeled, cored, and grated (about ½ cup)

Heat the oven to 400˚. Grease a 12-cup muffin tin.

In a large bowl, stir together flour, baking powder, cinnamon, nutmeg, cloves, allspice and salt. In a small bowl, whisk the egg white and the buttermilk. In a medium bowl, whisk the egg yolk and the melted butter. Pour the egg white mixture into the egg yolk mixture and stir. Add the sugar and vanilla. Mix well. Stir in the pumpkin and the grated apple.

Pour the wet ingredients over the dry ingredients. Stir just until combined, about 10 seconds. Do not over-mix. Divide the batter among the muffin cups. Bake for 18 to 20 minutes, or until golden. Remove the muffins from the tin to a cooling rack. Serve warm.

Monday, October 19, 2009

Fall Comes in on Little Pumpkin Feet

Overnight, fall blew into northwest Florida. We went to bed in the 80/80s—80 degrees and 80 percent humidity—and by the next afternoon the air was clear and cold. Fifty-seven degrees cold. For many of you, 57 is balmy, but for us of the thin blood, it’s cold.

Not that I’m complaining. After a humid summer comparable, as my husband says, to walking around in someone’s mouth, we welcome this cold front with jeans and sweatshirts and the first closed-toe shoes we’ve worn in months.


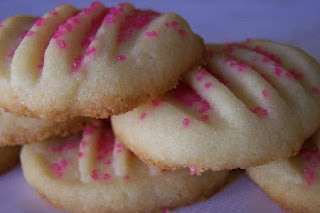
We also welcome fall with baking. These pressed cookies, both rich and crisp, are a family Christmas favorite. Butter, sugar, vanilla—those are the scents of the season. But because 12 discs came in the cookie press box, I see no reason not to enjoy them any month of the year. For October we chose, naturally, the pumpkin, tinted the dough orange, and sprinkled the pressed shapes with chocolate jimmies.


Cookie presses are notoriously finicky; for this particular batch, the pumpkin stem would not come out with the rest of the pumpkin. With a forefinger I removed each square bit of dough clinging to the disc and tapped it into the top of each pumpkin on the sheet. It was a time-consuming, frustrating chore, but important, for without a stem a pumpkin is nothing but a gourd with goiter.


Pressed Cookies

If you don’t have a cookie press, you can still make these cookies. Simply roll teaspoonfuls of the dough into balls and flatten with the bottom of a drinking glass or the tines of a fork dipped in flour.

3 ½ cups flour
1 teaspoon baking powder
1 ½ cups butter (3 sticks)
1 cup sugar
2 egg yolks, lightly beaten
1 ½ teaspoons vanilla extract

In a medium bowl, combine the flour and baking powder; set aside. In a large bowl, cream the butter and sugar until pale and fluffy. Add beaten egg yolks and vanilla extract; beat well. Gradually add the flour mixture, stirring until all is incorporated.

Fill cookie press fitted with disc of your choice. Press cookies onto baking sheets, leaving about an inch between cookies. (Because the dough does not expand much, you can fit a lot of cookies on one sheet.) Bake for 9 to 11 minutes, or until cookies are set and have just the faintest bit of golden brown along the bottom edge. Of course, you can cook them a minute or three past the golden state if you like. Some in our family like them quite brown and crisp.

Remove from pan and cool on racks.

Tuesday, October 13, 2009

Fresh Friendship

Last week my friend Ann gave me some sage and a sweet bell pepper she had left on the vine until it reddened. Ann grows her garden—carrots, beets, leaf lettuces, tomatoes, peppers, cucumbers, zucchini, and 6 different herbs—in pots on her third-floor balcony. Space is precious up there, and every leaf, bud and fruit treasured.

There’s an analogy here with our friendship. For 13 years, Ann and I shared precious office space. We treasured every conversation, every prayer, every cup of cocoa (her) and coffee (me) and every homemade chocolate chip cookie.

Though we don’t work together anymore, and we both miss the dailyness of us, we keep in touch with Sunday evening chats over coffee and tea, phone conversations, and browsing trips to World Market and the mall. Our friendship has changed its color on the vine, but it’s still as good as ever, and I’m grateful.


Chicken with Sweet Red Pepper and Fresh Sage (serves 4)
4 boneless, skinless chicken breast halves
½ teaspoon rubbed sage
½ teaspoon dried thyme
salt and pepper
1 teaspoon olive oil
2 teaspoons butter, divided
1 red bell pepper, seeded and sliced into ½-inch wide strips
1 small onion, sliced
15 fresh sage leaves
1 cup white wine or chicken broth

Pound chicken breasts to ½-inch thickness. Sprinkle both sides of each breast with rubbed sage, thyme, salt and pepper. Heat a skillet over medium-high heat; add olive oil and 1 teaspoon butter. When the fat is hot, lay the chicken in the skillet presentation-side down. Cook breasts, turning once, about 7 minutes, or until just cooked through. Remove to a platter and tent with foil to keep warm.

Reduce heat to medium-low and add remaining teaspoon butter. When the foam subsides, add pepper and onion to the skillet; cook, stirring occasionally, until vegetables are crisp-tender, about 5 minutes. Add 10 sage leaves and cook briefly, until just wilted. Deglaze the skillet with wine or chicken broth. Simmer until reduced by half. Adjust the salt and pepper, if necessary.

Spoon bell pepper mixture over chicken. Sprinkle remaining sage leaves on top. Serve over hot rice or noodles.

Saturday, October 10, 2009

Fried Shrimp and Grilled Shrimp and Crab, Oh My

On Oct. 9, 2009, at the National Shrimp Festival in Gulf Shores, Ala, we found the kind of culinary craftsmanship that would be at home in the kitchens of many fine restaurants. Nearly 40 vendors sold foods grilled, fried, and boiled, the cooks acquiring fresh local seafood, treating it lightly with good ingredients, giving it a quick bit of time over the fire, and offering plenty of smiles to the crowds along the way.


You’d expect shrimp to be featured at its namesake festival, and featured it was. Grilled, fried, blackened, coconut, peel and eat, Cajun: any way you like shrimp, you could get it. The grills, fryers, and pots were also hot with lobster tails and crab claws, crawfish pie and etouffee, gumbo and grouper, jambalaya, crab cakes, scallops and oysters, and shark on a stick.


Plenty of food not from the sea was available, too, including fresh salads, sausages, chicken, and rice.


As impressive as the taste of the food was the hospitality of the cooks. At South Beach Grill, Steve and his mom Chalor, who has been “the boss,” Steve said, of the enterprise for 35 years, took some time to chat while they cooked shrimp, grouper, paella, crawfish, and other food.


South Beach Grill has been working festivals all over the country, most recently in Johnston, Penn., at a bike rally. They have won Best of the Festival at Gulf Shores 3 of the last 4 years, for their coconut shrimp and crab cakes.


When we sampled the food of South Beach Grill, we understood why they’re winners. The crab cake, enough for two, combined crab and a flavorful filling tasting of celery and rich breading throughout. A skewer full of enormous shrimp spent barely three minutes on the grill, and then Steve wrapped it in foil and handed it over. It was tender and succulent and tasted of parsley and the sea.


At the side of the tent, Robert Ogren of Pensacola scooped out piles of brilliant red crawfish for hungry patrons and didn’t mind entertaining a bit while he worked.


It wasn’t all savory; cooks were serving great sweets, too, including typical fair food, funnel cake and the like. The Copelands of Copeland’s Ice Cream out of Theodore, Ala., dished up homemade chocolate, strawberry, and vanilla ice cream, churned under the power of a sturdy little John Deere engine.


Pensacola was well-represented by several vendors, including Cajun Specialty Meats, known all over the country for their legendary turducken.


Cajun Specialty Meats had a lot of good stuff going on. Boudin balls, crawfish etouffee, and fried crawfish, alligator, and shrimp were the general favorites. The etouffee is made, as their website says, with “crawfish tails smothered in the Cajun trinity (onions, bell pepper, and celery), tomatoes and our perfect blend of Cajun spices, mixed with rice.”


With boudin, a fresh pork sausage, the Broussard brothers of CSM make the best, biggest fritters I’ve ever eaten. Boudin balls sport a thin crispy crust around soft mixture of sausage, rice, and Cajun spices.


See what I mean about hospitality? As Carl shows, it was all good. “Spicy—Yes, Hot—Never!” the people of Cajun Specialty Meats say about true Cajun seasoning.

It was definitely hot on the boardwalk, the heat index reaching 105° by early afternoon, and likely hotter under those tents with the fires going, but at every tent we met people who love food, cooking, and making others happy, no matter the temperature.


Friday, October 9, 2009

The Wing Is the Thing


Tonight at Pensacola’s first ever King of the Wing contest at Cordova Mall, Kevin and I were the ones systematically sampling Buffalo-style wings from each of the 12 restaurants represented, trying to keep hot sauce off camera and notepad. The event was hosted by the Home Builder's Association of West Florida and Mike Carroll of BHC Concrete, along with a lot of other wonderful people. The object? Feed people all the wings they can eat, and find out whose wing is the best in Pensacola.


We’re recent wing aficionados, we admit it. But we know what we like, and we liked what we ate tonight. We liked the whole experience, from watching Yard Bird, the official fowl of the HBA, dance with some children to peeking into the tent where local celebrity judges were tallying the points. Kevin and I make a great team. I take the photos and jot the information, and Kevin tells me each wing’s flavor notes.


There were flavor notes aplenty. Some wings gave us varying degrees of vinegar and tang. In others we detected onion, tomato, citrus, and garlic. We had to leave before the competition results (best hot wing, best flavored wing, best overall) were announced (so someone will have to comment below). Kevin’s favorite turned out to be a toss-up between Kooter Brown’s and Route 66 Legendary Wings. Of Kooter Brown’s Kevin said, “The skin is crisp without being dry. When you get down to the meat, it’s really succulent.” From Legendary Wings we sampled their classic hot wing, which had perfect flavor and texture, “exactly what you expect from a wing,” Kevin said, and their “legendary” flavor, which was the one with notes of citrus within the spicy sauce. Wing Stop was also high on both our lists, not only because it’s the first place we ever had hot wings, but also because their wings have classic, well-balanced flavor. I loved the wings from Famous Dave’s; they’d been smoked before being doused in spicy barbecue sauce. Delicious.


For all the restaurants that participated, thanks for the great food. If I can help your business begin or improve your online presence with kicking web content, please visit my site to see what I can do for you.